Hi, I’m Jimmy, a tech specialist, and today I’ll help you fix the problem when the HP LaserJet 1020 driver not working on Windows. This issue can also happen with HP LaserJet 1018 and P1005 printers.
Quick Answer
If the HP LaserJet 1020, 1018, or P1005 driver is not working, the problem is usually caused by Windows updates, missing drivers, or incorrect installation.
These printers are older models, so Windows does not always install the correct driver automatically.
Reinstalling the driver manually or using an automatic driver tool usually fixes the problem.
Table of Contents
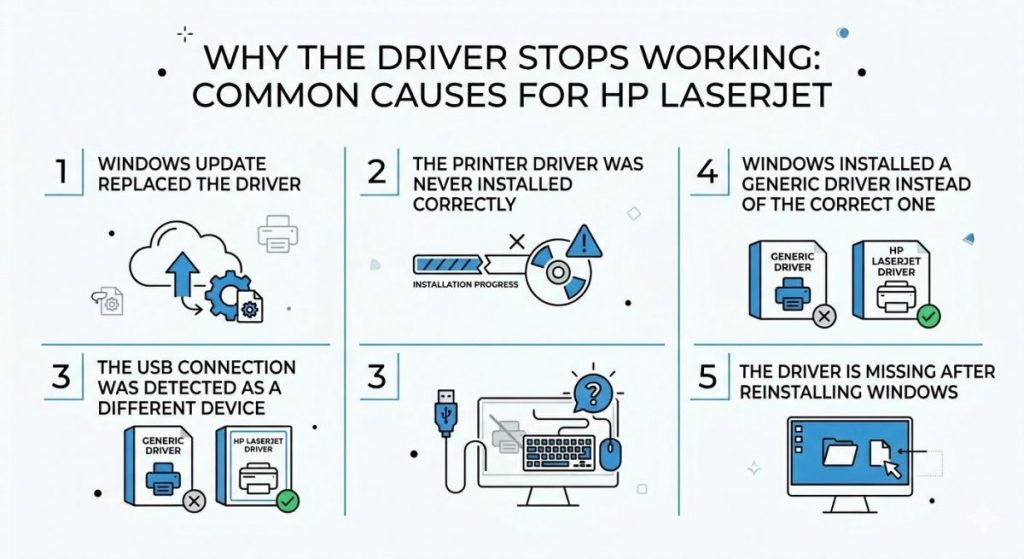
Common Causes of HP LaserJet 1020 Driver Not Working
These printers are very reliable, but they were designed a long time ago. Because of that, modern versions of Windows sometimes have trouble working with them.
Here are the most common reasons the driver stops working:
- Windows update replaced the driver
- The printer driver was never installed correctly
- The USB connection was detected as a different device
- Windows 10 or 11 installed a generic driver instead of the correct one
- The driver is missing after reinstalling Windows
I see this a lot with the LaserJet 1020 and P1005, especially after a Windows update.
If the HP LaserJet 1020 driver not working, the problem is usually related to incorrect driver installation, Windows updates, or USB connection issues. The same problem can also affect HP LaserJet 1018 and P1005 printers.
Fix 1 – Reinstall the HP LaserJet Driver Manually
First, we try the classic fix. Remove the old driver and install the correct one again.
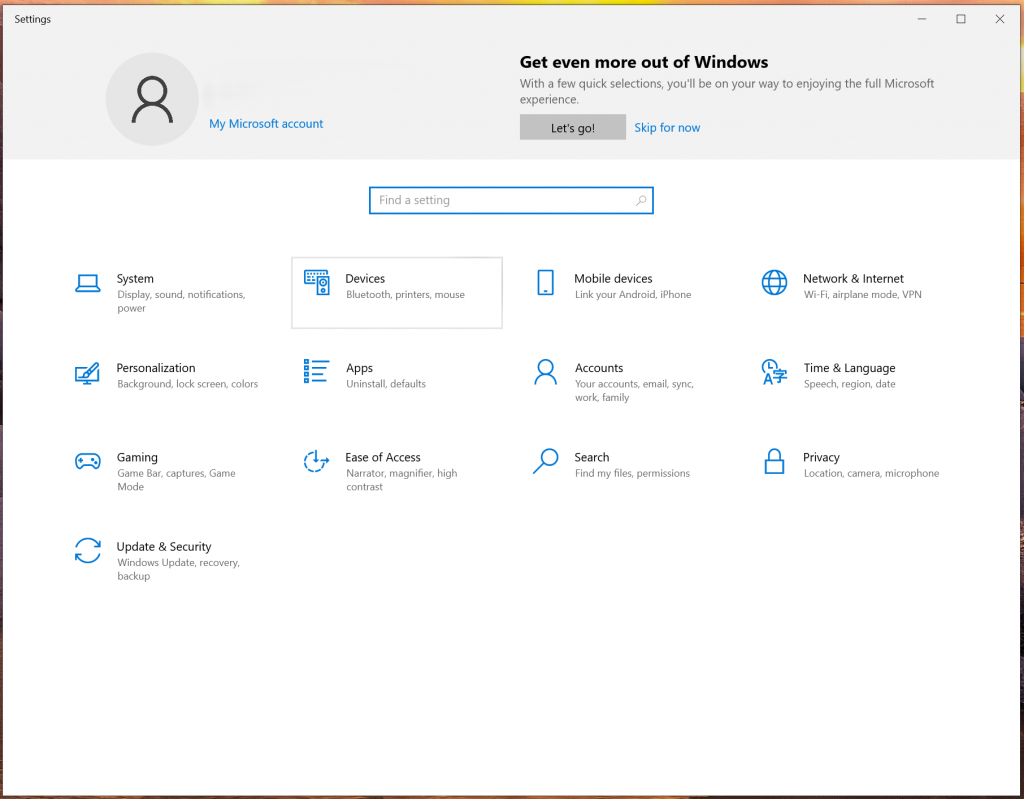
Step 1. Remove the old printer
- Click Start
- Open Settings
- Click Bluetooth & devices
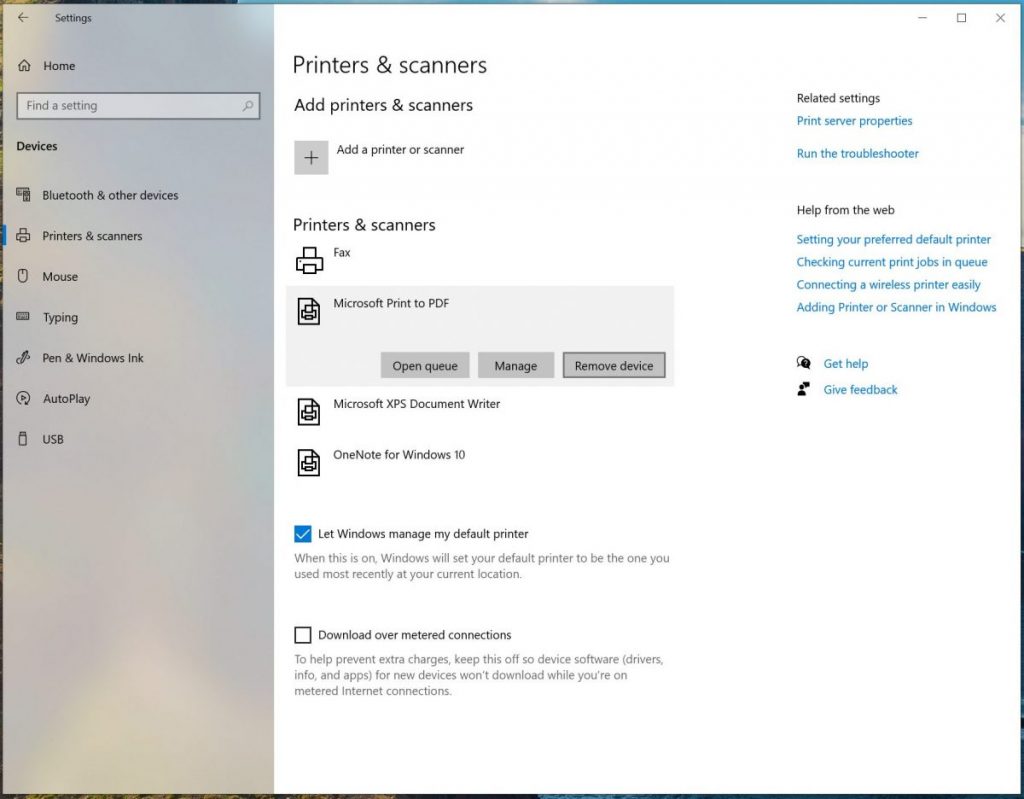
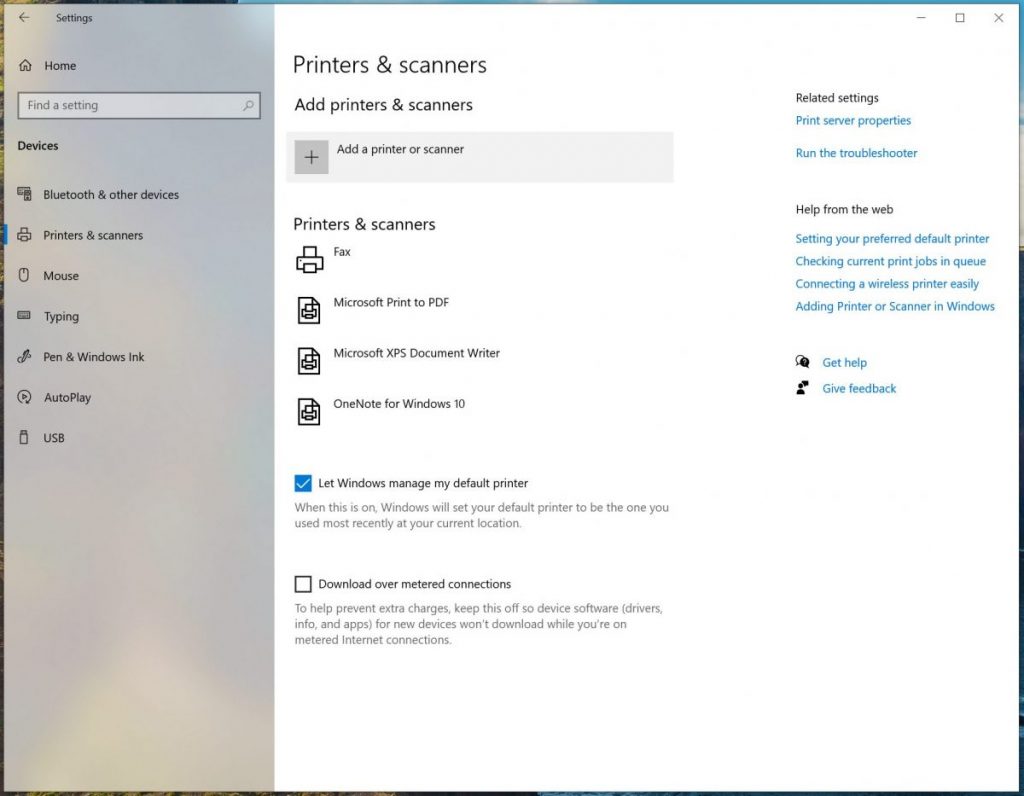
- Click Printers & scanners
- Select your HP LaserJet printer
- Click Remove device
Restart the computer after removing it.
Step 2. Download the correct driver
Go to the official HP support website and search for:
Download the driver for your version of Windows.
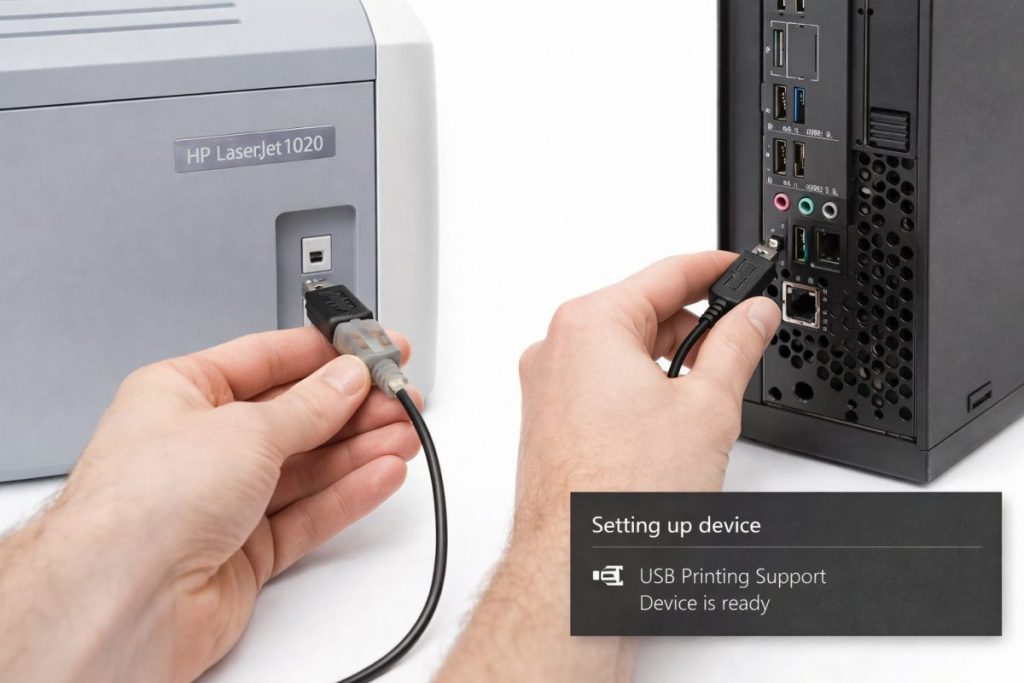
Step 3. Install the driver before connecting the printer
This is important for old HP printers.
Install the driver first.
Only connect the USB cable when the installer asks for it.
Safety Note
If you connect the printer too early, Windows may install the wrong driver automatically.
Fix 2 – Check Device Manager for Driver Errors
Sometimes the printer is detected, but the driver failed.
- Right-click Start
- Click Device Manager
- Look for Unknown device or USB Printing Support
- Right-click it
- Click Update driver
- Choose Browse my computer
- Select the folder where you downloaded the HP driver
This forces Windows to use the correct driver.

Fix 3 – Use Windows Update to Install the Legacy Driver
Some HP LaserJet models use built-in Windows drivers.
- Open Settings
- Go to Printers & scanners
- Click Add device
- Click Add manually
- Choose Add a local printer
- Select USB port
- Click Windows Update in the driver list
- Wait for the list to refresh
- Find HP → LaserJet 1020 / 1018 / P1005
Install the driver from the list.
Pro Tip
The Windows Update driver list can take 1–2 minutes to load. Many people think it froze, but it is just downloading more drivers.
Fix 4 – Try a Different USB Port
This sounds simple, but it helps surprisingly often.
Old HP printers sometimes get linked to a specific USB port.
- Disconnect the printer
- Plug it into a different USB port
- Wait for Windows to detect it again
- Reinstall the driver if needed
Windows may treat it as a new device and install the correct driver.
Final Words
Printer driver problems happen all the time, especially with older HP LaserJet models, but in most cases the fix is simple once the correct driver is installed.
Take it step by step, and your printer should start working again.
If your printer still does not work after reinstalling the driver, you can also read our guide on why your printer is not working and how to fix common printer problems in Windows.

I’m a computer technician who helps people fix everyday Windows problems, driver issues, and device errors.I focus on simple step-by-step solutions designed for beginners and people who are not very confident with computers.My goal is to make computer troubleshooting clear, practical, and easy for everyone.